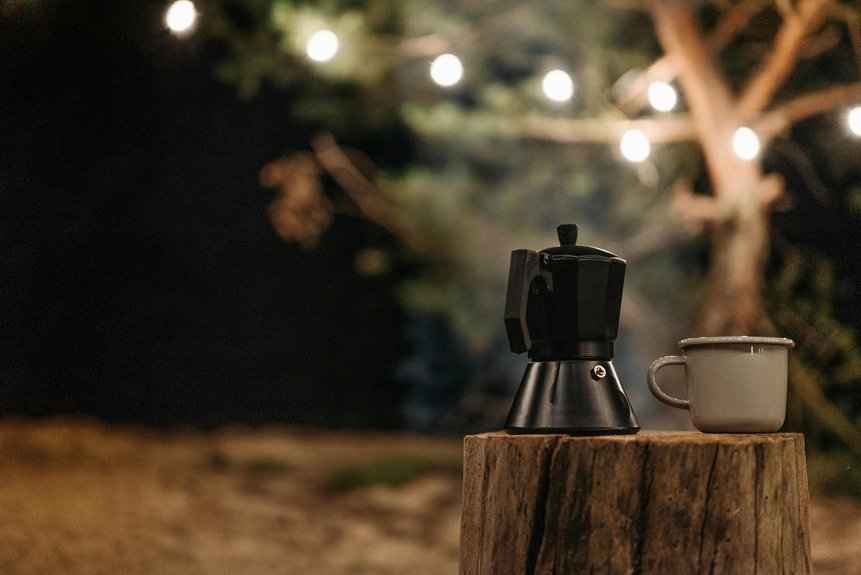
Brewing coffee in the wild can be both a simple pleasure and a complex art. With a camping percolator at your side, you can transform the great outdoors into your personal café. The right technique can yield a rich, aromatic cup that complements the stunning scenery around you. But how do you achieve that perfect brew? Let’s explore the essential steps to elevate your outdoor coffee experience.
Choosing the Right Camping Percolator
When you’re gearing up for a camping trip, selecting the right camping percolator can make all the difference in your morning routine.
Start by considering the size; a percolator that brews enough coffee for your group is essential. Look for materials like stainless steel for durability and even heat distribution, ensuring your coffee brews evenly.
Weigh the benefits of a lightweight model if you’re hiking, as portability matters. Think about ease of use too; some percolators come with simple designs that make brewing a breeze, even over a campfire.
Finally, check the lid and spout design for easy pouring without spills. With the right percolator, you’ll enjoy rich, flavorful coffee to kickstart your outdoor adventure.
Essential Equipment and Ingredients
To brew the perfect cup of coffee in the great outdoors, you’ll need a few essential pieces of equipment and ingredients.
First, grab a camping percolator; it’s your trusty vessel for brewing. A heat source, like a camp stove or fire pit, is vital for getting that water boiling.
Don’t forget a sturdy coffee grinder if you prefer freshly ground beans—this elevates your coffee experience. Choose high-quality coffee grounds; go for medium to coarse grind for ideal extraction.
You’ll also need fresh, cold water, ideally filtered for the best taste. Finally, pack a measuring spoon to guarantee you use the right coffee-to-water ratio.
With these essentials, you’re ready to enjoy a flavorful cup of coffee under the open sky!
Preparing Your Campfire or Stove
Before you can enjoy that rich cup of coffee, you need to get your campfire or stove going.
If you’re using a campfire, gather dry twigs, kindling, and larger logs. Arrange them in a teepee shape to promote airflow, and light the kindling with a match or lighter. Watch as the flames dance, feeling the warmth as they grow.
If you’re opting for a stove, make sure it’s on a flat surface. Connect your propane tank or fuel source, and ignite it according to the manufacturer’s instructions. Adjust the flame to a medium heat; you want a steady boil, not a raging inferno.
With your fire or stove ready, you’re one step closer to brewing that perfect camping coffee!
Setting Up the Percolator
Setting up your camping percolator is a straightforward process that can take just a few minutes. First, gather your components: the pot, filter basket, and lid. Confirm everything is clean and free from debris.
Place the percolator on a stable, heat-resistant surface near your campfire or stove. If you’re using a campfire, make sure it’s at a manageable height to prevent burning.
Assemble the percolator by inserting the filter basket into the pot. Secure the lid tightly to keep the heat in. Check that the percolator sits level; this confirms even brewing.
Once set up, you’re ready to move on to adding water and coffee grounds for that perfect brew in the great outdoors. Enjoy the anticipation!
Adding Water and Coffee Grounds
Adding the right amount of water and coffee grounds is essential for brewing a delicious cup of coffee in your camping percolator.
Start by pouring fresh, cold water into the percolator’s bottom chamber. A general rule is to use about 6 ounces of water for each cup you want to brew, but adjust based on your taste preferences.
Next, measure out your coffee grounds. A good starting point is 1 to 2 tablespoons of coarsely ground coffee per cup of water. Remember, the coarser the grind, the better the flavor extraction during brewing.
Place the filter basket in, add the grounds, and verify everything’s securely in place. With the right balance of water and coffee, you’re set for a great brew!
Brewing Process: Timing and Techniques
Once you’ve got your percolator ready, it’s time to plunge into the brewing process, where timing and technique play essential roles in achieving the perfect cup of coffee.
Start by placing your percolator over medium heat. Keep an eye on it; you want the water to reach a gentle simmer, not a rolling boil.
As the water heats, it’ll cycle through the coffee grounds, extracting those rich flavors. Aim for a brewing time of about 8 to 10 minutes for a robust cup.
Stirring occasionally can enhance the flavor extraction, so don’t hesitate to give it a gentle mix.
Knowing When Your Coffee Is Ready
As your coffee percolates, you’ll start to notice the telltale signs that it’s nearly ready.
Watch for the bubbling and gurgling sounds, which signal the brewing process is in full swing. You’ll see dark, rich coffee rising through the glass knob on the lid, changing from a light amber to a deep brown. The aroma will fill the air, enticing you with its rich scent.
Typically, after about 8 to 10 minutes of brewing, your coffee should be perfect. If you prefer a stronger brew, let it percolate a bit longer, but be cautious; over-brewing can lead to bitterness.
Trust your senses—sight, sound, and smell are key indicators that your coffee is just right for sipping.
Pouring and Serving Your Brew
When your coffee’s ready, it’s time to pour and serve your brew.
Carefully lift the percolator from the heat, using a pot holder to protect your hands from the heat.
Tilt the spout towards your favorite mug, letting the rich aroma of freshly brewed coffee waft into the air.
Pour slowly to control the flow, avoiding spills and ensuring every drop counts.
As you serve, take a moment to appreciate the deep, dark color of your coffee, a promise of its robust flavor.
If you have sugar, cream, or milk, offer them on the side, allowing everyone to personalize their cup.
Enjoy the warmth of your drink while soaking in the beauty of the great outdoors.
Cheers to a great camping experience!
Cleaning and Maintaining Your Percolator
After enjoying that perfect cup of coffee, it’s time to think about keeping your camping percolator in top shape.
Start by disassembling your percolator, removing the basket and tube. Rinse all parts with warm water to eliminate any coffee residue. For stubborn stains, use a gentle scrubber or a mix of baking soda and water. Avoid harsh chemicals that can damage the metal.
Once clean, dry everything thoroughly to prevent rust. If your percolator has a build-up of mineral deposits from water, consider a vinegar solution to help dissolve it.
Regular cleaning after each use guarantees your percolator lasts longer and brews great-tasting coffee every time. Keep it maintained, and your next adventure will be caffeinated bliss!
Tips for Enhancing Your Coffee Experience
To elevate your coffee experience while camping, consider the little details that can make a big difference.
Start with fresh, high-quality coffee beans; they’ll enhance flavor and aroma. Grind them just before brewing for maximum freshness.
Experiment with water temperature—ideally between 195°F and 205°F—to achieve the perfect extraction.
Don’t forget to bring along a cozy mug; sipping from a well-chosen cup can elevate your enjoyment.
If you’re feeling adventurous, try adding spices like cinnamon or nutmeg for a unique twist.
Finally, take a moment to relish your brew in the great outdoors—find a scenic spot, breathe in the fresh air, and appreciate the simple joy of a perfectly brewed cup of coffee amidst nature.